Disclosure: As an Amazon Associate, we earn from qualifying purchases.
Every summer, high-volume commercial cleaning crews and homeowners face the same frustrating issue: freshly waxed floors suddenly lose their deep gloss and develop an ugly, milk-like haze. In the floor care industry, we call this phenomenon "wax blushing" or moisture haze. Having spent more than two decades maintaining hardwood, VCT (vinyl composition tile), and terra cotta surfaces, I have seen thousands of square feet of expensive acrylic wax turn cloudy simply because someone rushed an application on a humid afternoon.Quick answer: Wax finishes turn cloudy in humid weather because excessive atmospheric moisture traps water droplets inside the drying polymer layers before the solvent evaporates completely. High relative humidity (above 65%) slows down the curing phase, causing the optical clarity of the finish to break down and create a milky film. You can prevent this by monitoring ambient conditions, applying thinner coats, and controlling air movement with high-velocity air movers.
The Science of Wax Blushing: Why Moisture Traps Haze
Understanding why floor wax turns cloudy begins with how modern floor finishes cure. Traditional paste waxes rely on solvent evaporation, while modern commercial floor finishes use water-based acrylic polymer emulsions. When you mop a coat of acrylic wax onto a tile or wood floor, two things must happen simultaneously: the liquid carrier (water) must evaporate into the air, and the microscopic plastic particles must coalesce into a clear, continuous protective film.
When relative humidity levels spike above 65% to 70%, the air becomes saturated with moisture vapor. As a result, the water trapped inside the wet wax film cannot evaporate into the atmosphere at its normal rate. Instead, solvent molecules evaporate faster than the trapped water, altering the chemical balance of the curing acrylic layer. The trapped micro-droplets of water create micro-cavities within the film that refract light randomly rather than reflecting it directly, making your shiny floor look dull, milky, or gray.
Another major contributing factor is dew point differential. If your substrate—such as concrete-backed VCT or slab-on-grade hardwood—is significantly cooler than the warm, humid ambient air, moisture condenses directly onto the wet finish. Applying a fresh coat over a damp or cold subfloor seals that condensation inside the lower layers, guaranteeing a cloudy appearance once the top layer seals over.
Environmental Factors and Common Mistakes That Cause Hazy Wax
While high humidity is the primary catalyst for cloudy wax, several common application mistakes exacerbate the issue during wet or muggy weather. Identifying these variables early saves hours of costly stripping and re-waxing work.
The most frequent mistake is applying coats that are too thick. When floor technicians submerge a string mop and lay down heavy coats in muggy weather, the surface skin dries quickly while the lower layer remains wet. This surface skin prevents internal water from escaping, trapping moisture beneath an airtight seal. Second, failing to allow sufficient dwell time between coats leads directly to cloudiness. In dry conditions, a finish might be ready for a second coat in 30 to 40 minutes, but high humidity can easily double that drying window to 75 minutes or longer.
Meguiar's Professional M26 Hi-Tech Yellow Wax, 16oz

Cleaner's tip: Never rely on a quick touch test with your fingertips to check if a floor finish is ready for another coat. Softly press the heel of your thumb firmly into the wax and give it a slight twist; if you feel any tackiness or leave a subtle print, the lower film is still holding moisture. If you lay down another coat over that soft base on a humid day, you will trap the fog forever.
Air movement and HVAC settings also play a vital role. Turning off air conditioning overnight right after applying floor wax to save power is a guaranteed recipe for blushing. HVAC systems do not just cool the air; they pull pints of moisture out of the atmosphere. Shutting off the unit lets ambient moisture settle onto the uncured finish while it completes its 24-hour curing cycle.
Comparing Wax Drying Times Across Humidity Levels
To help you plan your floor care schedule around weather conditions, review the empirical performance metrics below. These numbers reflect standard commercial acrylic floor finish (20% solids content) applied on vinyl composition tile at standard indoor room temperatures (70°F / 21°C).
| Relative Humidity (%) | Dwell Time Between Coats | Total Recommended Coats per Day | Risk Level for Wax Blushing |
|---|---|---|---|
| 30% – 45% (Ideal) | 30 – 45 minutes | 4 – 5 thin coats | Very Low |
| 46% – 60% (Moderate) | 45 – 60 minutes | 3 – 4 thin coats | Low to Moderate |
| 61% – 75% (High) | 75 – 90 minutes | 2 – 3 paper-thin coats | High |
| 76%+ (Severe) | 120+ minutes (Not Advised) | 0 – 1 coat maximum | Extreme (Do Not Wax) |
How to Fix Cloudy Floor Wax (From Quick Fixes to Total Stripping)
If you discover that your floor finish has already turned cloudy, do not panic. Depending on how deeply the moisture is trapped within the film layers, you can apply a graduated approach to restore clarity without immediately jumping to heavy chemical stripping.
- Attempt Heat and Air Extraction (Mild Cloudiness): If the wax was applied within the last 12 hours and the haze is mild, set up high-velocity air movers (3-speed, 1/4 HP fans pulling around 2,500 CFM) angled at 45 degrees across the floor. Turn your HVAC system down to 68°F (20°C) with the dehumidifier mode engaged. In many cases, reducing room humidity allows trapped surface moisture to escape over 24 hours.
- Perform High-Speed Burnishing (Surface Blushing): If the haze is isolated to the top layer and the wax has cured for at least 24 hours, use a high-speed floor burnisher (1500 to 2000 RPM) equipped with a natural hair or ultra-high-speed thermal pad. The friction heat generated by the pad warms the acrylic finish, softening the surface layer enough to drive out micro-moisture and smooth out microscopic optical imperfections.
- Top-Scrub and Re-Coat (Moderate Inter-Layer Haze): When haze is trapped between the top two coats, burnishing might not reach it. Use a green or blue scrubbing pad on a low-speed floor machine (175 RPM) with a neutral cleaner diluted at 1 oz per gallon (pH 7.0–8.0). Wet-scrub away the top cloudy coat, pick up the slurry with a wet/dry vacuum, rinse twice with cold water, let it dry thoroughly, and apply one thin coat during lower humidity conditions.
- Complete Chemical Strip and Recoat (Severe Deep Blushing): If all layers are cloudy due to heavy application during 80%+ humidity, full restoration is required. Apply a non-ammoniated floor stripper diluted at 1:4 with warm water (pH 12.0–13.0). Allow a 10-minute contact dwell time, scrub with a black stripping pad, extract the residue completely, rinse with a neutralizing solution (pH 4.0–5.0), and start over when relative humidity drops below 60%.
Proven Prevention Strategies for High-Humidity Floor Waxing
Pro Breeze Electric Mini Dehumidifier for Home (215 sq.ft) 17oz Capacity, Energy Efficient, No Noise, Compact and Portable for High Humidity in Kitchen, Bedroom, Bathroom, Basement, RV, Office, Garage

Preventing cloudy floor wax in humid climates requires proper preparation, the right equipment, and accurate climate measurement tools. Professional floor technicians never guess humidity levels; they measure ambient conditions before opening a single bucket of finish.
Invest in a digital thermo-hygrometer to measure both temperature and relative humidity inside the space. If the relative humidity exceeds 65%, postpone major wax jobs or run industrial commercial dehumidifiers capable of removing 100+ pints of moisture per day prior to application. Always keep your application coats paper-thin by using microfiber flat mop waxing systems rather than heavy cotton string mops. Microfiber lays down an even layer of approximately 0.5 to 0.8 mils per coat, allowing trapped moisture to evaporate quickly even in sub-optimal air conditions.
Always maintain positive airflow without blowing air directly onto wet finish. Direct air currents across wet acrylic finish can cause "flash drying" on the top while trapping liquid below. Position air movers so air sweeps across the room ceiling, creating a gentle down-draft circulation that removes moisture evenly without disrupting film formation.
Final Professional Recommendation
If you are managing hard floor surfaces in humid regions or during summer months, your best path forward is to strictly monitor relative humidity with an inexpensive hygrometer and never apply finish when indoor moisture exceeds 65%. For routine maintenance, choose a high-solids (20% to 25%) acrylic polymer finish applied exclusively with flat microfiber finish pads in paper-thin coats. If haze occurs, try thermal burnishing first before investing time and labor into full chemical stripping.
Frequently Asked Questions
Can I use a heat gun or space heater to dry cloudy floor wax faster?
No, using direct heat sources like heat guns or space heaters is not recommended. Direct concentrated heat causes the top layer of acrylic to skin over instantaneously, permanently sealing trapped moisture underneath and causing bubbling, blistering, or severe cracking.
Liberon Beeswax Paste, 150 ml, Clear

Why does my floor wax turn cloudy only in certain spots near doors or windows?
Spot-cloudiness near doorways, exterior walls, or floor vents is caused by localized draft zones and temperature differentials. Exterior doors let in humid outdoor air, while concrete slabs near exterior walls remain cooler, leading to localized condensation during the curing phase.
How long should I wait to wax floors after wet stripping in muggy weather?
After wet stripping and rinsing, wait at least 60 to 90 minutes in humid weather before applying your first coat of wax. Even if tile surfaces look dry, moisture remains trapped inside porous grout lines and microscopic tile crevices; applying finish too early seals that water under the initial coat.
Does humidity affect paste wax on wood floors the same way it affects tile finish?
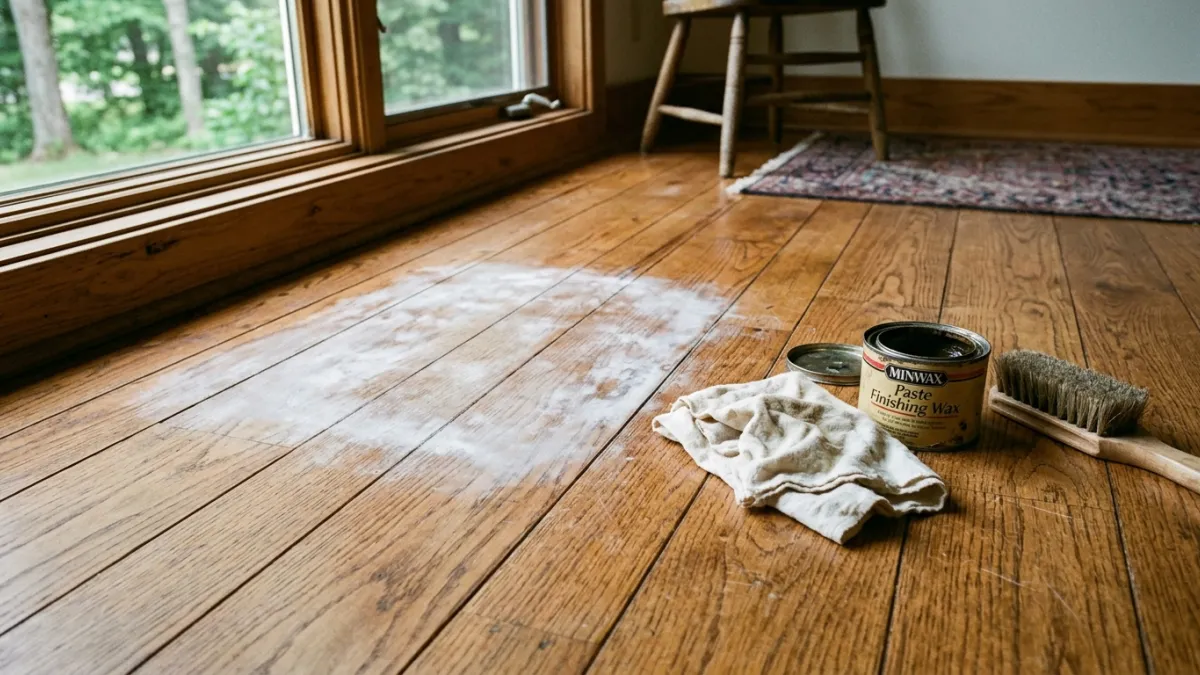
Yes, paste wax (solvent-based carnauba or paraffin) blushes in humid weather as well. Excess humidity causes solvent evaporation to stall, trapping moisture droplets between the wood grain and the wax film, resulting in a dull white or gray cast over the timber.
Sources
- CleanLink Professional Floor Care Guidance
- ISSA - The Worldwide Cleaning Industry Association Standards
- U.S. Environmental Protection Agency - Indoor Air Quality & Moisture Control
Looking for the Right Tools?
Check out our verified Top Cleaning Tools & Supplies on Amazon.
As an Amazon Associate, we earn from qualifying purchases.